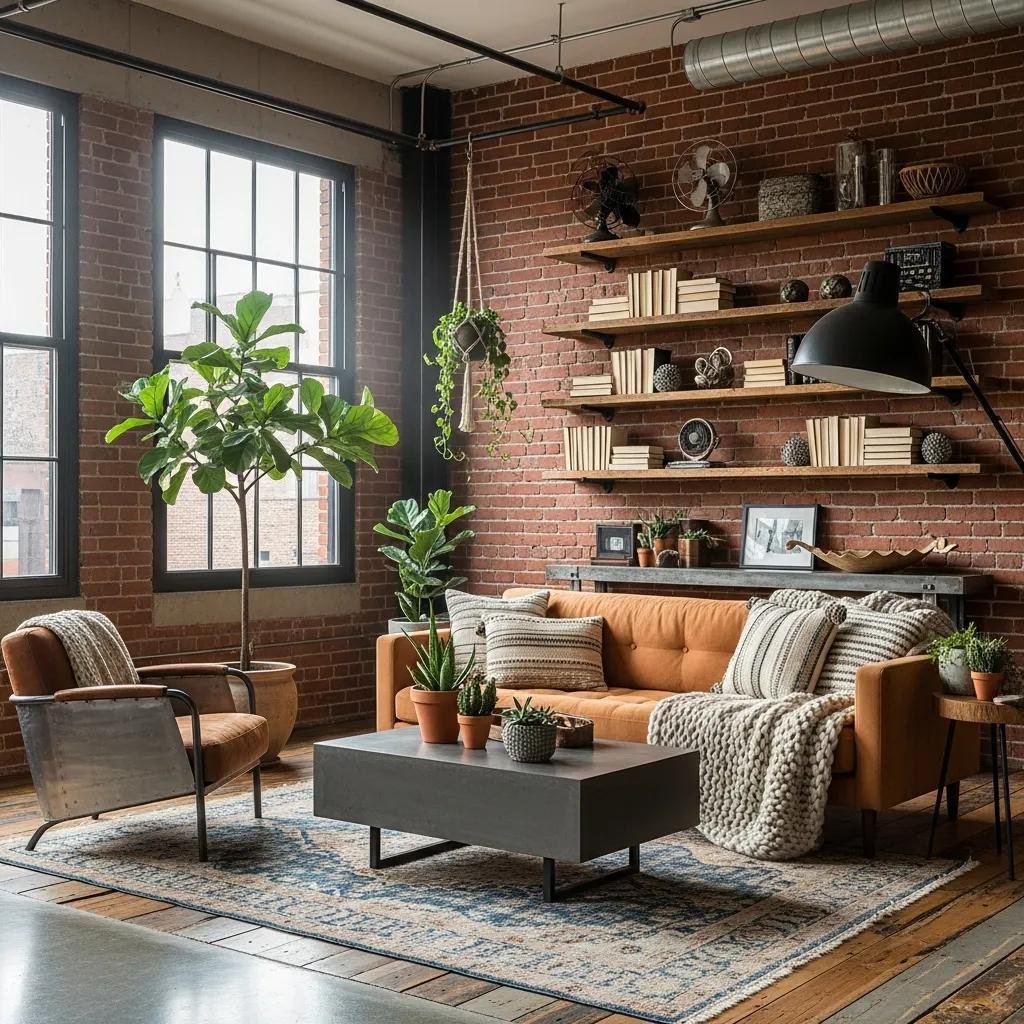
Simplicity & Functionality: Scandinavian Design
Scandinavian Kitchens: Functional Luxury for D.C. Homes
Scandinavian kitchens pair pared-back aesthetics with practical systems and natural materials to create calm, highly usable spaces that suit luxury homes across Washington, D.C. This guide walks through the core principles of Nordic layouts, material choices that balance beauty with durability, and straightforward steps for turning minimalist ideas into everyday reality. If you want a bright, uncluttered kitchen that works for both cooking and gathering, the Scandinavian approach delivers: it prioritizes efficient workflow, integrated storage and daylight. Read on to learn how clean lines improve function, which woods and surfaces stand up to an urban climate, how to choose flooring that supports the look, and how hygge and lagom shape whole-home renovations. Practical lists, comparison tables and step-by-step guidance appear throughout to help you make informed decisions, with brief notes on how a local design‑build partner can support delivery. Relevant design terms—minimalist design principles, nordic home decor, hygge home decor and sustainable scandinavian materials—are used where helpful for clarity and search relevance.
What defines a functional Scandinavian kitchen?
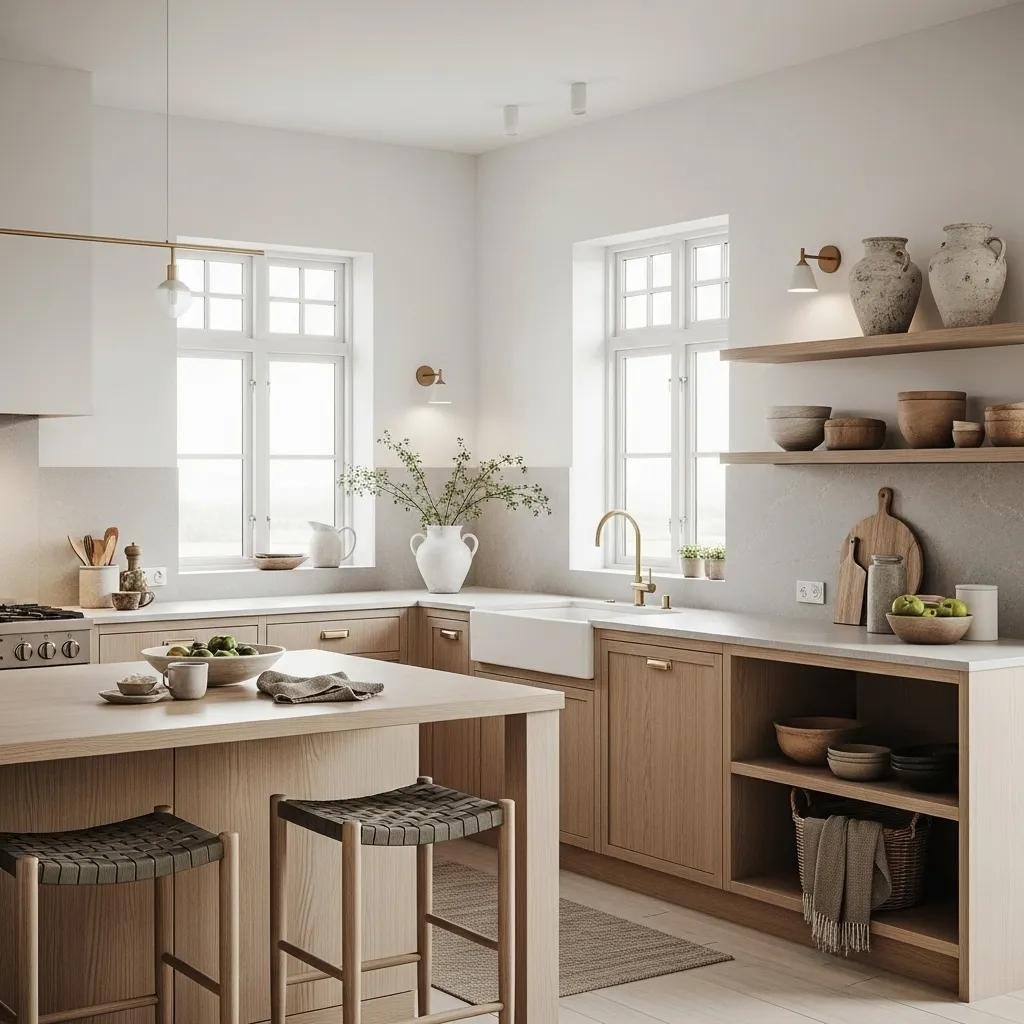
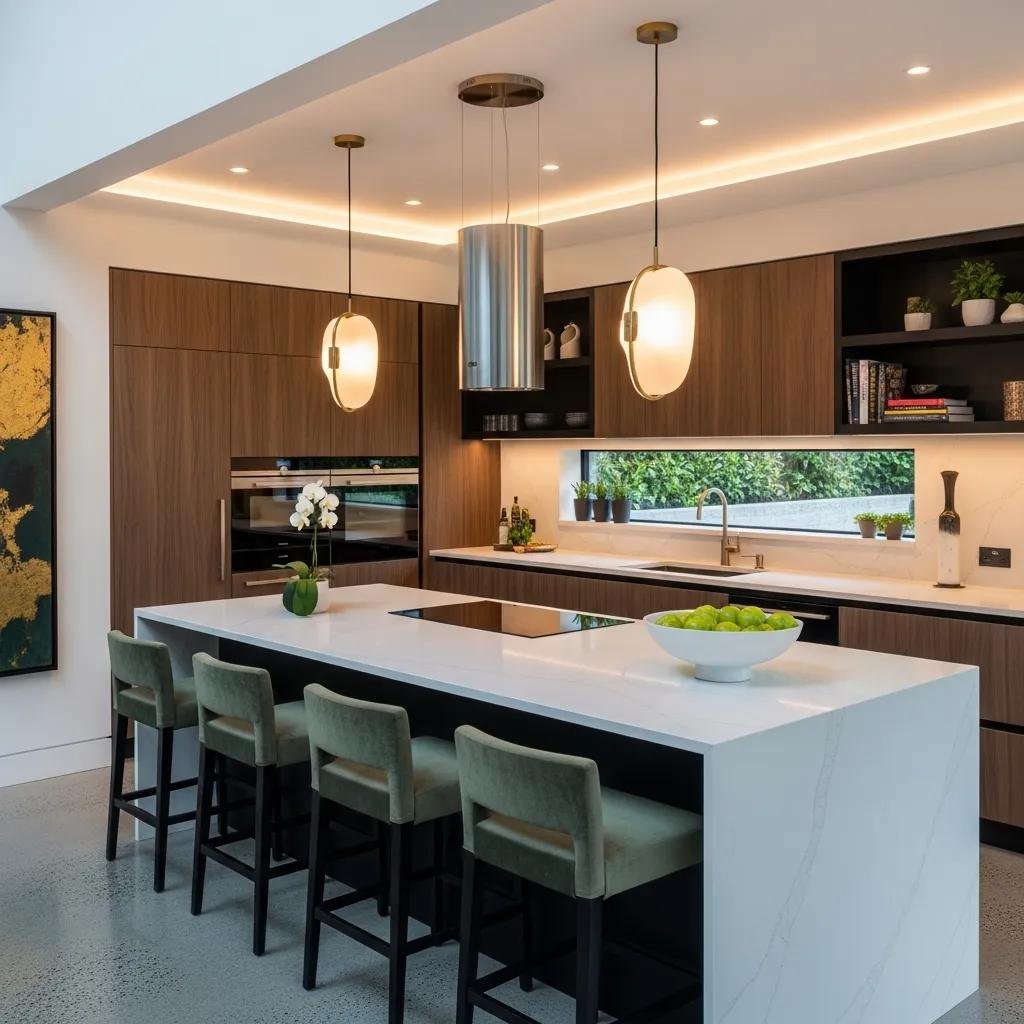
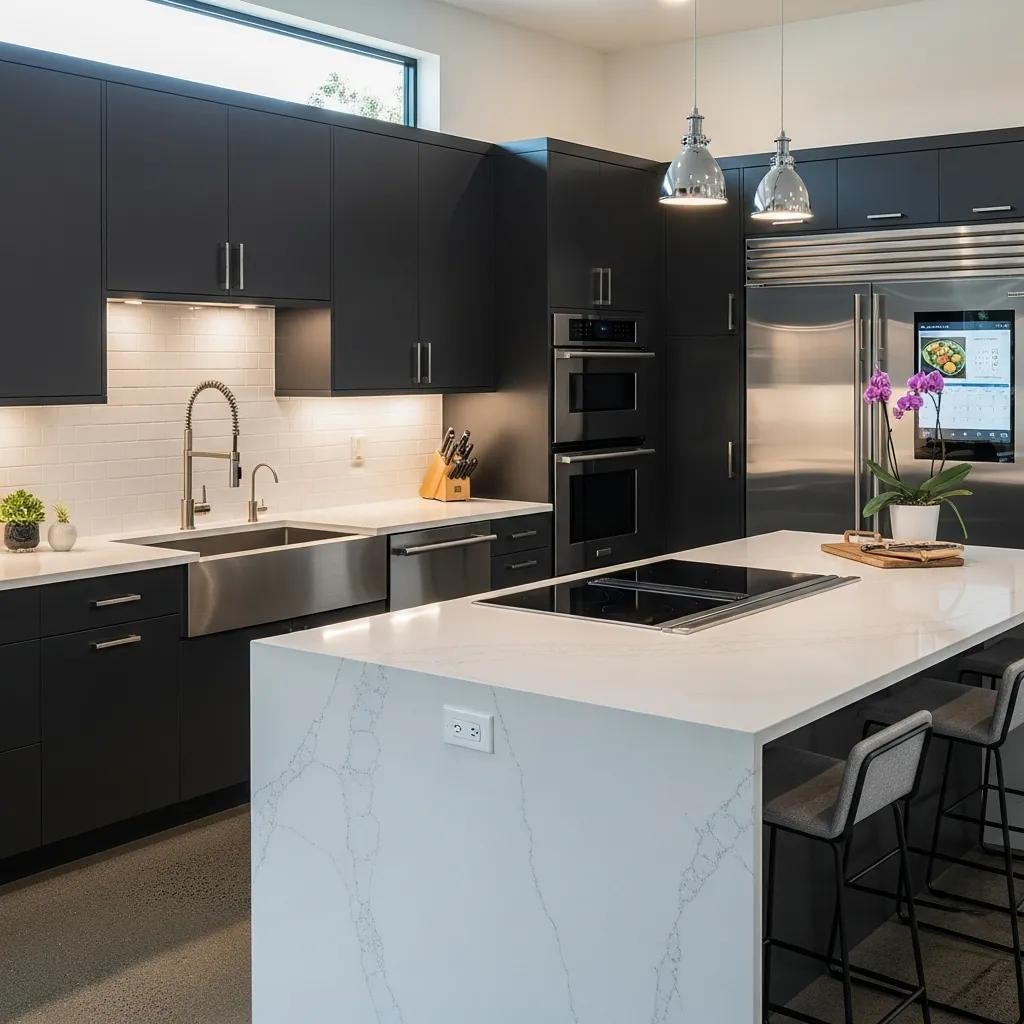
A functional Scandinavian kitchen combines minimal form with purposeful systems so the room performs well every day. Simplicity trims visual clutter, intelligent zoning shortens task paths, and built-in storage keeps counters clear for prep and socializing. The style emphasizes natural light, pale wood tones and durable finishes that age gracefully while staying low-maintenance. Below are the core principles followed by a compact comparison of cabinet options and their practical benefits before we discuss materials in more detail.
Scandinavian kitchens are built on three guiding principles:
- Simplicity: Fewer decorative details and uncluttered surfaces create visual calm and make cleaning easier.
- Functionality: Clear workflow, purpose-built zones and hidden storage streamline everyday use.
- Natural materials: Light woods and muted stone finishes add warmth while standing up to regular wear.
These ideas steer the material and layout recommendations in the following sections.
Cabinet materials differ in feel, maintenance needs and long-term performance—factors that matter in a Nordic kitchen.
This quick comparison shows how lighter, well-performing materials support both the Scandinavian aesthetic and lasting function.
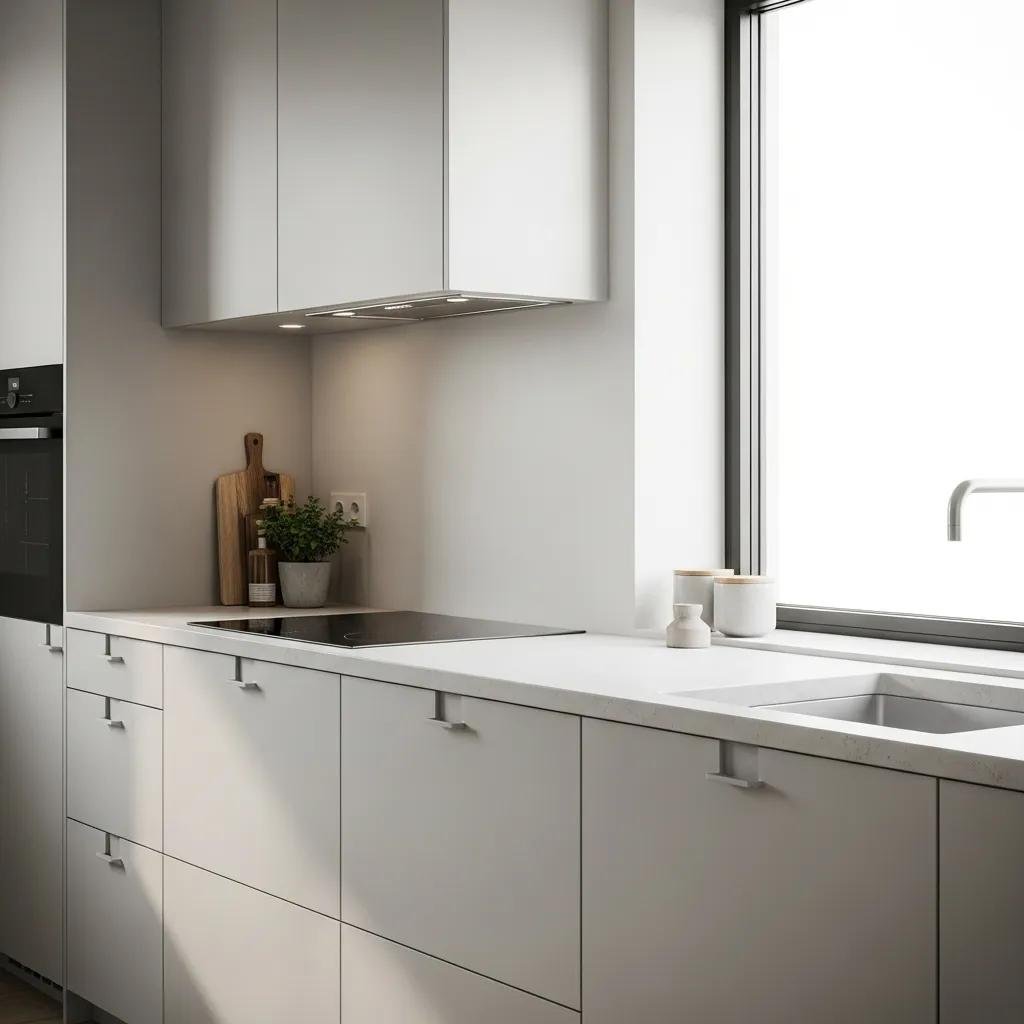
How do clean lines and minimalism improve kitchen usability?
Clean lines and restrained detailing directly support kitchen workflows: they reduce visual interruptions and simplify upkeep. Flat-panel cabinets, integrated handles or push-to-open hardware and concealed appliance panels create continuous surfaces that keep the focus on cooking and socializing, not ornament. A limited palette also boosts natural light, making work zones feel larger and more organized while cutting down on surfaces that trap dirt or need special care. With that clarity it’s easier to pick practical systems—soft-close drawers, built-in dividers and organized pan storage—that enhance usability without undermining Nordic simplicity.
For example, pairing push-to-open drawers with deep pull-out pan storage shortens retrieval time and keeps counters clear for prep—an efficiency choice that naturally informs material selection.
Which natural materials matter most in Nordic kitchen remodels?
Scandinavian kitchens rely on a restrained palette—light woods, soft stone, matte ceramics and tactile textiles—to balance warmth with restraint. Oak and birch make durable veneers that take whitewash or clear finishes well, while engineered stone countertops offer low-maintenance surfaces that complement pale wood tones. Porcelain or ceramic tiles in muted hues work well for backsplashes where water resistance is important, and textured textiles add hygge without visual clutter. Choosing materials that age gracefully and need minimal upkeep preserves the minimalist intent and aligns with commonly recommended sustainable scandi materials.
Always weigh moisture exposure, daily wear and maintenance expectations—selecting tougher surfaces for high-use areas preserves the look over time.
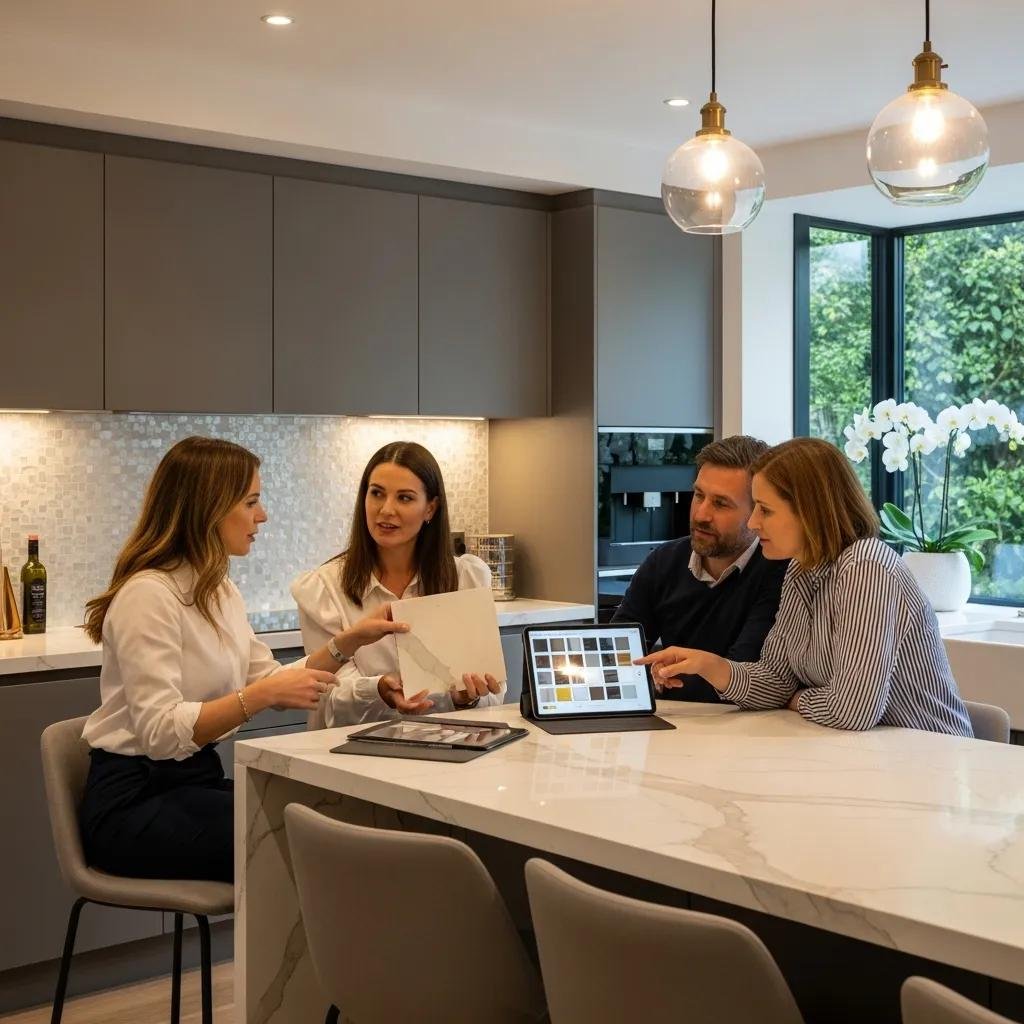
(Scanbuild LLC note: For Washington, D.C. homeowners looking for a turn-key kitchen remodel, Scanbuild LLC provides a full design-build service from initial sketches through construction. We help refine your ideas, vet materials and deliver quality workmanship. A complimentary consultation can clarify feasibility and budgets before final design decisions.)
How to create a luxury Scandinavian bathroom in Washington, D.C.

A luxury Scandinavian bathroom favors serene materials, streamlined fixtures and layered lighting that support relaxation and everyday care. Start with a pared palette—muted stone or porcelain tile, matte fixtures and warm wood accents—then combine layered lighting and reliable ventilation to protect comfort and longevity. Sustainable, water-resistant materials and compact, efficient layouts make the most of many D.C. homes while preserving a spa-like feel. The table below compares tile and fixture types for aesthetic and water-performance trade-offs to guide quick decisions.
This comparison helps you prioritize durable finishes and fixtures that match Nordic minimalism while performing well in humid bathroom environments.
A practical, step-by-step approach makes a spa-like bathroom achievable:
- Define mood and palette: Choose muted tones and natural textures as a calming foundation.
- Prioritize plumbing layout: Locate showers, drains and fixtures to simplify waterproofing and maintenance.
- Layer lighting and ventilation: Combine task, ambient and accent lighting with effective ventilation to prevent moisture issues.
- Choose sustainable, durable surfaces: Use low‑VOC finishes and water-efficient plumbing to reduce long‑term impact.
These steps create a clear roadmap from concept to installation, balancing aesthetic calm with long-term performance. The following sections go deeper on fixtures and sustainable choices.
What makes a spa-like Nordic bathroom retreat?
To craft a spa-like Nordic bathroom, make deliberate choices: a muted neutral palette, generous but simple fixtures (freestanding tub or walk-in shower), layered lighting and tactile textures for warmth. Matte or satin finishes, warm wood vanities and soft textiles add hygge without clutter, while frameless shower glass and recessed niches keep sightlines clean. Storage should be minimal and smart—concealed medicine cabinets and under-sink drawers keep essentials accessible but out of view. Good ventilation and moisture-resistant substrates ensure the tranquil look endures with low maintenance.
Together these elements turn a functional room into a restorative retreat that supports daily rituals and strengthens resale appeal.
How do sustainable materials support Scandinavian bathroom renovations?
Sustainable choices improve indoor air quality and reduce long-term costs while reinforcing the minimalist aesthetic. Low‑VOC paints and sealants, water-saving fixtures, and tiles made with recycled content lower environmental impact and ease maintenance. Picking materials that need less frequent replacement—engineered countertops, sealed porcelain tiles—matches the Scandinavian focus on longevity and responsible sourcing. Weigh lifecycle impacts when specifying finishes to preserve both the spa-like atmosphere and practical durability expected in luxury renovations.
Understanding these trade-offs helps you prioritize investments that deliver environmental benefits and everyday performance.
(Scanbuild LLC note: For homeowners exploring bathroom renovations, Scanbuild LLC offers packaged options—our “BATHROOM DEAL”—to simplify choices and budgeting. We can advise on sustainable fixtures and finishes that fit a spa-like Scandi plan.)
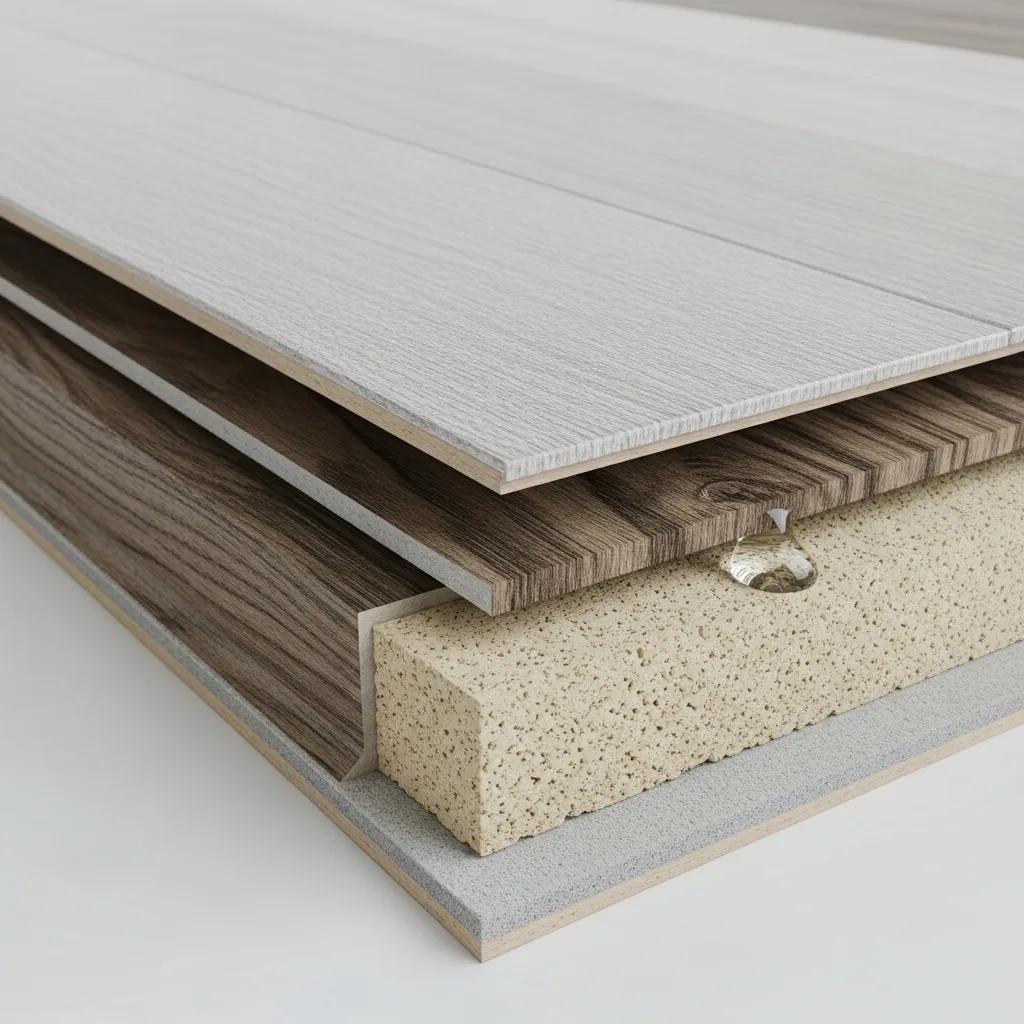
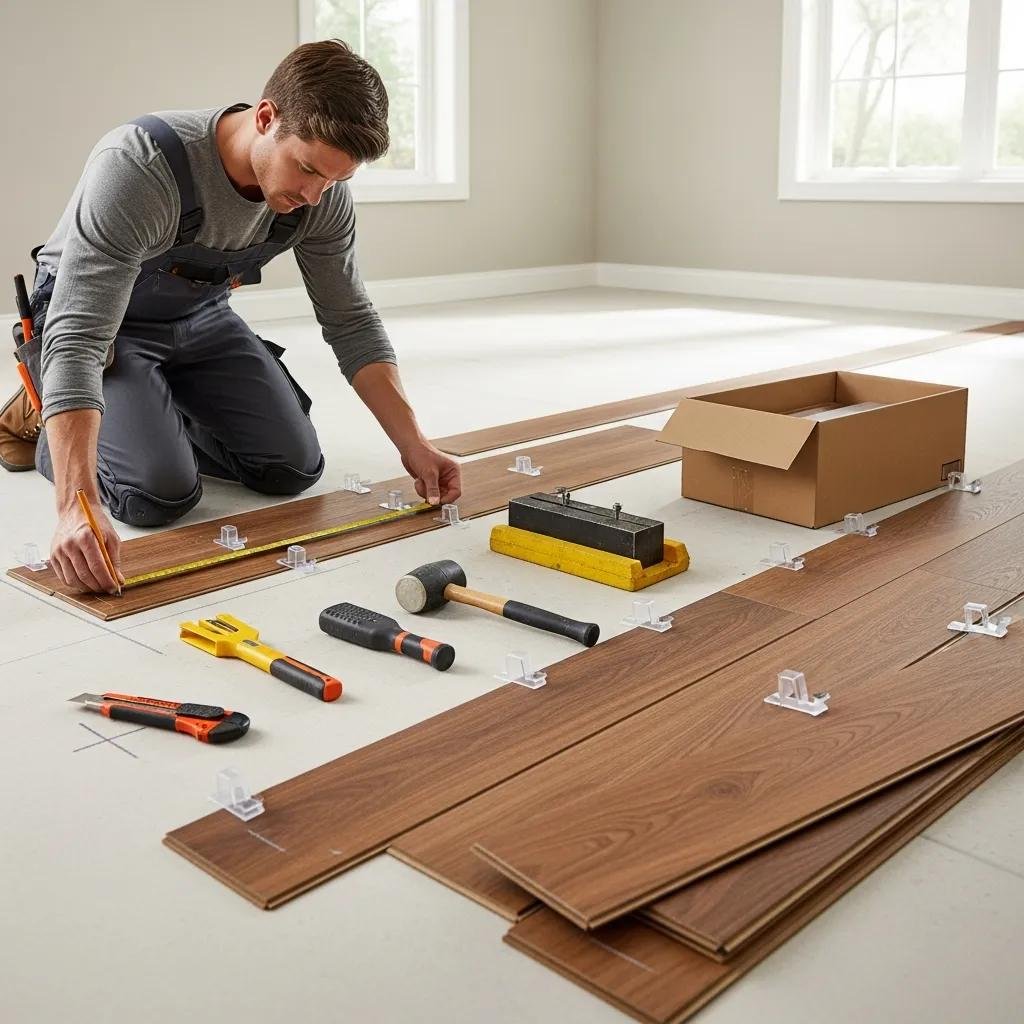
Best Scandinavian flooring options for D.C. homes
Flooring anchors the Scandinavian palette and must suit Washington, D.C.’s mixed‑humid climate and urban lifestyle. Top picks are light engineered wood for main living areas, luxury vinyl tile (LVT) for moisture-prone or high-traffic zones, and select porcelain tile for baths and entries. Each choice balances look, durability and upkeep; the table below summarizes durability, visual fit and maintenance to guide room-by-room selection. After the table we explain why light wood and LVT are frequently recommended.
This comparison helps match material performance to room function while keeping a cohesive Scandinavian look.
- Visual harmony: Pale wood tones brighten interiors and complement muted palettes.
- Practical warmth: Engineered wood brings the feel of solid wood with greater humidity stability.
- Moisture management: LVT offers waterproof performance where spills or humidity are concerns.
Selecting materials by room—engineered wood for living spaces, LVT for kitchens and entries, tile for baths—delivers cohesive aesthetics and sensible longevity. Proper installation and suitable underlayment further align durability with the minimalist design intent.
(Scanbuild LLC note: Scanbuild LLC installs LVT and light-engineered wood flooring as part of our remodeling services across the Washington, D.C. area. We provide consultations to match material performance and finish to each home’s needs.)
Why choose light wood and LVT for Nordic interiors?
Light wood and LVT support the Scandinavian focus on bright, tactile surfaces while offering practical upside. Engineered light wood creates visual continuity and can be repaired or refinished; modern LVT gives realistic texture with strong water resistance and easy cleaning. For homes with pets, children or heavy traffic, LVT often delivers the best lifecycle value with minimal compromise to appearance. Selecting the right underlayment and installation method ensures comfort, sound control and long-term stability in townhouses and condos.
These trade-offs guide room-specific decisions that preserve the Nordic aesthetic without sacrificing daily performance.
How does flooring durability fit Scandinavian design values?
Durability is a form of sustainability in Scandinavian design: choosing long-lasting materials reduces turnover and keeps the minimalist look intact. Prioritize scratch-resistant finishes, appropriate underlayments and professional installation to prevent premature wear and maintain clean lines. In entryways and high-traffic zones, resilient options like LVT or porcelain tile protect the scheme, while engineered wood retains warmth in living areas. Attention to installation details—moisture barriers, acclimation and proper fastenings—keeps materials performing as intended and preserves the design intent.
Durable flooring choices therefore support everyday use and the restrained, timeless look at the heart of Scandi interiors.
How functional Scandinavian interiors improve whole-home renovations
Functional Scandinavian design lifts whole-home renovations by applying kitchen and bathroom principles—simplicity, utility and quality—across living spaces. Hygge and lagom—comfort and balanced sufficiency—guide furniture scale, textiles and storage so rooms feel calm and useful. Built-in storage, multipurpose furniture and daylight optimization keep spaces intentional and uncluttered, improving circulation and perceived size. The homeowner benefits below summarize why many clients choose Scandi principles and preview practical implementation notes.
Key homeowner benefits of functional Scandinavian design:
- Calmer living spaces: Less visual noise promotes mental clarity and daily ease.
- Improved functionality: Efficient storage and layouts shorten routines and simplify upkeep.
- Long-term value: Timeless materials and durable systems support resale appeal and lower lifecycle costs.
These benefits explain why homeowners often prioritize Scandinavian principles for both lifestyle and investment reasons. The sections that follow unpack hygge, lagom and practical strategies for light and storage.
(Scanbuild LLC note: Scanbuild LLC uses a design-build process to integrate hygge and lagom-driven solutions—custom closets, upgraded laundry layouts and built-in storage—so renovations move smoothly from concept to completion. Our consultations align these strategies with your budget and timeline.)
What role do hygge and lagom play in creating calm, intentional homes?
Hygge and lagom work as guiding principles that shape material choices, furniture scale and sensory qualities. Hygge emphasizes tactile comfort—soft textiles, warm lighting and carefully chosen objects—while lagom encourages balance and sufficiency, steering choices toward purposeful rather than excess items. Combining both means selecting a small number of high-quality pieces and layering textures to add warmth without clutter. The result is a home that feels welcoming and deliberate, supporting daily rituals and social moments with minimal visual distraction.
Translating these ideas into renovation decisions makes abstract lifestyle goals tangible and actionable.
How can natural light and decluttering improve Scandinavian home functionality?
Maximizing natural light and using targeted decluttering strategies are practical levers to improve perceived space and everyday function. Tactics include keeping window treatments light, using reflective but muted surfaces to bounce daylight, and adding built-in storage to hide rarely used items. Regular decluttering routines paired with designated storage zones prevent buildup and preserve the clean sightlines essential to the Scandinavian look. Effective light and storage strategies reinforce kitchen and bathroom choices, ensuring a cohesive, sustainable whole-home approach.
These tactics connect directly to material and layout decisions in kitchens and bathrooms to keep the overall scheme consistent.
Frequently Asked Questions
What are the benefits of incorporating hygge and lagom into home design?
Hygge and lagom together create homes that feel comfortable and balanced. Hygge brings warmth through soft textiles and ambient lighting; lagom encourages moderation and well-considered choices. The combined effect is a calm, purposeful space that supports everyday life and social moments while reducing stress. Integrating these ideas helps you create a home that reflects your lifestyle without excess.
How can I ensure my Scandinavian kitchen remodel is sustainable?
Prioritize durable, low-impact materials and efficient systems: low‑VOC paints, responsibly sourced or reclaimed woods, energy-star appliances and engineered stone or recycled surfaces. Choose finishes that require minimal upkeep and fixtures that conserve water. Working with a design‑build specialist helps you select options that meet sustainability goals while matching your aesthetic and budget.
What lighting options work best in a Scandinavian kitchen?
Layered lighting is key: combine ambient fixtures (recessed or pendant) with targeted task lighting under cabinets and accent lighting for focal areas. Warm‑tone LEDs create a welcoming atmosphere, and maximizing natural light—by keeping window treatments minimal—does a lot of the heavy lifting. Thoughtful pendants over an island can add character without breaking the minimalist rhythm.
How do I choose the right color palette for a Scandinavian kitchen?
Stick to light, muted tones to enhance brightness and calm. Start with whites, soft grays or pale pastels as a base, then introduce natural wood accents and small color pops through textiles or accessories. This restrained palette supports the Scandinavian values of simplicity and functionality while keeping the space inviting.
What are the best storage solutions for a Scandinavian kitchen?
Smart storage focuses on accessibility and a clean look. Built-in cabinetry with integrated handles, pull-out drawers, concealed organizers and vertical storage systems keep essentials organized and out of sight. Open shelving can display curated items sparingly. Prioritizing functional, well-planned storage preserves the minimalist aesthetic and makes daily life easier.
How can I incorporate natural elements into my Scandinavian kitchen design?
Use light woods for cabinetry and accents, stone or ceramic backsplashes for texture, and plants—herbs or small succulents—to bring life into the room. Maximize daylight with minimal window coverings so natural light highlights materials and creates a strong connection to the outdoors.
Conclusion
Adopting Scandinavian design principles for your kitchen remodel creates spaces that are both functional and serene. By prioritizing natural materials, clean lines and efficient layouts, you get a timeless aesthetic that supports everyday living. If you’d like help translating these ideas into a Washington, D.C. renovation, consult a local design‑build team. Our experienced designers and builders can tailor solutions that match your vision and budget—reach out to learn how we can transform your home into a refined Scandinavian retreat.


Recent Comments